Introduction
A huge variety of materials for English language teaching exist! Many of these materials are professionally developed and commercially published, and you will be fortunate if you use them. But they are not available everywhere, and they are too expensive for many ESL/EFL programs. In fact, the minimal budgets of some programs do not allow them to provide any teaching materials for classes. If you find yourself in a situation where you don’t have the materials you need to teach (or money to purchase those materials), don’t despair. The guidelines and ideas presented in this unit will help you pull through.
scenario: Two teachers in need of good teaching materials
Scenario 1. Bob was an American going to a less developed country to teach English in a school connected with a humanitarian organization. Before he left, he was told that the school would provide English textbooks for him and his students. When he arrived in country and got to the school, however, he quickly realized that the textbooks were not only very old and worn but extremely outdated in their language, teaching/learning activities, and representations of modern American culture. For example, one unit on the various rooms in a house talked about a “parlor,” and the kitchen it depicted did not even have a microwave oven. Plus, most of the textbook activities involved simply repeating alphabetized lists of vocabulary items after the teacher and then translating sentences from the students’ native language into English and vice versa. Bob knew he would not enjoy teaching from this book and that, even if he did use it, his students would not learn the English they needed to communicate in the modern world. He had to do something different. Fortunately, the school administrators told him that he could teach any way and use any teaching materials he wanted. After all, he was the American “expert.” Glad for this freedom, he now wondered what helpful English-teaching materials he could come up with.
Scenario 2. Joan was a new teacher in a community ESL course held several evenings a week in her local public library. 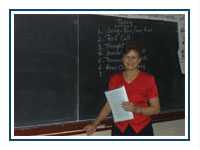 The students were adult immigrants to the United States. She was enthusiastic about helping them develop English skills. Those skills would allow the immigrants to integrate socially into the community and improve their economic situations by getting better jobs. She was shocked, however, when she learned that not only were there no textbooks provided (for her or the students) but also that there was no budget for purchasing supplementary materials. How could she teach if all she had was a chalkboard on the wall? She went to a local educational supply store, but the prices were higher than she could afford to pay. She was, after all, an unpaid volunteer teacher. Both of these teachers faced the challenge of either collecting or creating their own language-teaching materials at little or no cost. What would you do in if you were in Bob’s or Joan’s situation? The students were adult immigrants to the United States. She was enthusiastic about helping them develop English skills. Those skills would allow the immigrants to integrate socially into the community and improve their economic situations by getting better jobs. She was shocked, however, when she learned that not only were there no textbooks provided (for her or the students) but also that there was no budget for purchasing supplementary materials. How could she teach if all she had was a chalkboard on the wall? She went to a local educational supply store, but the prices were higher than she could afford to pay. She was, after all, an unpaid volunteer teacher. Both of these teachers faced the challenge of either collecting or creating their own language-teaching materials at little or no cost. What would you do in if you were in Bob’s or Joan’s situation?
Objections of this Unit
After completing this unit you will be acquainted with…
- The need for resourcefulness, flexibility and creativity when collecting or creating language-teaching materials.
- A wide variety of freely available, low cost materials that can be used for developing English learners’ language skills and cultural knowledge.
- Some things you can do to create your own language-teaching materials from scratch.
The least you should know
 Visuals (words and pictures) and realia (authentic, real-world items that illustrate cultural and linguistic teaching points) can help convey meaning, capture students’ interest, and provide many other kinds of support for your learners, whether you are teaching English directly or engaged in content-based language teaching (see unit #35, “Teaching content-based language classes”). These items make abstract linguistic points concrete, visible, and memorable. They create a “here and now” that can make what you say more comprehensible to English language learners. They can also make classroom communication seem more natural. Any time you can provide visual support or bring real objects into the classroom, so much the better. Visuals (words and pictures) and realia (authentic, real-world items that illustrate cultural and linguistic teaching points) can help convey meaning, capture students’ interest, and provide many other kinds of support for your learners, whether you are teaching English directly or engaged in content-based language teaching (see unit #35, “Teaching content-based language classes”). These items make abstract linguistic points concrete, visible, and memorable. They create a “here and now” that can make what you say more comprehensible to English language learners. They can also make classroom communication seem more natural. Any time you can provide visual support or bring real objects into the classroom, so much the better.
Collecting existing materials at home, before going abroad
While it is possible to make many of your own teaching aids (see below), you don’t have to create everything on your own. You can simply gather up many useful items and take them to your teaching location. Many common, inexpensive items (e.g., an old newspaper, candy wrappers, cereal boxes, magazine pictures, etc.) have great linguistic and/or cultural value and can be used profitably in your classroom teaching. If you are teaching in your own community, getting these materials is relatively easy. If you are going abroad to teach English, you need to prepare ahead of time.
Below is a list of ideas for English teaching materials that you may want to gather to support your lessons. Not all of these items will be equally useful for all teachers in all situations. A lot will depend on your students’ age, proficiency level, learning goals, and cultural background. Nevertheless, since it is not always possible to get these items on the spur of the moment, you might want to at least start collecting some of them now.
- Pictures clipped out from ads, illustrations, and stories in magazines such as Time, Newsweek, Sports Illustrated, and Family Circle. Mail order catalogs are another good source for these pictures. They can be small (for mounting on 3" x 5" cards) or large (for mounting on 8 1/2" x 11" paper). If you are going abroad and must deal with baggage restrictions, to reduce bulk and weight, the mounting on cards or backing paper can be done after you arrive in country. These pictures will enable you to create a picture file that can be used for a variety of teaching purposes. They should illustrate people, clothing, actions, objects, interesting situations, etc.
- Simple, easy to transport items representative of American culture (e.g., restaurant menus, newspaper cartoons, advertisements, stamps, etc.)
- Picture postcards of scenes from your home town or state (or famous tourist attractions). The simplest way to use these is to take them to class and talk about them, but there are lots of other things you can do with picture postcards. You can also give them as souvenir gifts or rewards for your students. If you are abroad and get homesick you can even hang them up on your apartment wall to make yourself feel more at home.
- Tourist brochures, maps, flyers, posters about your home town or state, or the United States in general.
- Pictures (not expensive portraits; just snapshots or copies—they will get plenty of wear) of your home and family. You may also want to take pictures of the places, things, and people that are part of your daily life, such as your car, your kitchen, the local school, places you shop, etc.).
- Small gifts/souvenirs characteristic of your home area (pins, key chains, pens, etc.).
- Cultural materials (pictures, decorations, etc.) connected with various American holidays such as the Fourth of July, Halloween, Thanksgiving. (Note: Christmas cards and Valentines are becoming quite common in China).
- Sports-related items, such as player trading cards or magazines. Basketball and soccer may be your best bets for popularity. American football and baseball are not very popular in most countries outside the United States.
- Paper labels carefully removed from cans of food. Empty, opened, and flattened boxes of American cereal and other packaged food items. These labels and packages can be used for reading practice and for use as props in role plays and skits. (If you’re going abroad, you may be able to make these teaching materials after you arrive. American food items are available in specialty stores many cities around the world, but they are often expensive and hard to find.)
- Samples of American coins and currency, as well as personal checks. (U.S. coins make good gifts also. Many people around the world are avid coin collectors.)
- Samples of American postage stamps. (Like coins, stamps can be used for teaching as well as for gifts. Many students collect stamps.)
- CDs with English songs that are sing-able and at an appropriate language and maturity level (see unit #33 “Using songs and chants to increase participation, recall, and enjoyment”) such as popular songs, folk songs, and children's songs.
- "The Ungame" (travel edition, pocket size SPCN 5-90024-021-5) includes a set of cards that are very useful in convesation classes. A similar, pocket-sized game is "Kid Talk." (ISBN 0-96411084-0-2).
- World Almanac and Book of Facts or Guinness Book of World Records, for reference purposes as well as for stimulating conversation. (You don't need the current year's edition. Older ones will do just as well.)
- Old copies of Readers Digest and similar magazines with short, readable stories of general interest.
- A basic American history and/or geography book.
- A travel atlas or book of roads in the United States.
- A thesaurus (pocket-size).
- Copies of good children's literature books (of varying usefulness, depending on your teaching assignment).
- A musical instrument if you play one, especially if it allows singing along (e.g., a guitar, ukulele, or harmonica). These instruments may also be purchased at relatively low prices after you arrive in some countries. Along with the instrument, you may need written copies of the music and words for songs you know how to play/sing.
- A subscription to your hometown newspaper, a national newspaper like The Christian Science Monitor, or a magazine like Time or Newsweek that can be sent to your address abroad. Many of these publications are available online also.
- Audio and/or video recordings of scenes from American daily life, such as a family meal, a telephone call, and a radio or TV news broadcast.
- Audio and/or video recordings of special events with a cultural theme, such as a rodeo or a parade. (Warning, video recordings made for players in the United States may not be electronically compatible with players in other countries.)
- A personal (lap-top) computer with software and printer.
- A listing or book of English given names and their meanings. This information will be especially useful if you teach in a country where students take English names for themselves (or ask their teacher to give them an English name). Websites such as www.behindthename.com also provide this sort information.
But if you’re going abroad, space in your bags is limited, right? That’s OK. With a little resourcefulness and effort, there are many useful English-teaching materials you can get after you arrive.
Acquiring materials and realia after arriving in country
In many countries around the world, even those where English is not the official language, you can still find locally published English-language newspapers (For instance, in China, the China Daily is widely available at many universities. In Japan??? In Mexico??) You may also find English-language magazines such as Time, Newsweek, and Reader’s Digest at newsstands, bookstores, and other places. It is also possible to subscribe to the international editions of many English-language news magazines, and they will be delivered right to your new address. These publications can be a rich source of English language teaching materials. They have stories, pictures, cartoons, and advertisements that can be used for English learning activities.
Even non-English local newspapers, magazines, and catalogs have pictures that you can cut out and use for visuals.
Of course, with a personal computer and an Internet connection, you have access to the World Wide Web and a universe of potential language-teaching materials. Add a printer, and the possibilities for creating language-teaching materials from Internet sources are virtually endless.
Creating your own teaching materials
Wherever you teach, you can always create your own flash cards, word cards, and pictures. There is really no limit to the things you can do with these simple but extremely helpful teacher-made language-teaching materials. The only limitations are your own teaching ideas, imagination, and creativity.
If you’re going abroad, once you are in-country, you can usually get paper-based teaching-support items, such as index cards, poster board, and construction paper, as well as markers, without too much difficulty. The only trick is finding where they are sold. As a foreigner and cultural outsider, You may need some help knowing where to go, but you can often rely on your adult students for help. All you need to do is tell your students,“ I need some felt pens. Who would like to go on a little field trip with me this afternoon and show me where I can buy some?” This won’t work in all situations, but in many countries, highly motivated students will be happy to show you around and practice their English in the process. They know the city, they’ll take you to the right spot, and they may even translate for you as necessary. Of course, you shouldn’t use children for this purpose; you always need to abide by school regulations.
Here are a few examples of language-teaching activities using simple word cards and pictures:
- “Read and Remember” (from David Cross, Practical Handbook of Language Teaching, p.124)
- If you have students who are reluctant to speak English, this is a good activity to get them warmed up and participating. You simply choose about six to ten words on a topic that is at the right level and that is of interest to your students (perhaps from their current textbook lesson), and write each one in large print on a blank sheet of paper. You instruct your students to sit quietly, read the word cards as you hold them up one by one, and remember them. You then silently hold each card up where everyone can see it for a few seconds. Then you put it face down on the table and hold up the next card. After you’ve shown all the cards, you ask the students questions about them that can be answered by simply saying the word that was on the card. For example, if you chose the theme of transportation, you might have cards with words like wagon, bus, tricycle, bicycle, truck, motorcycle, boat, airplane, and helicopter on them. After showing these word cards silently, you ask questions such as “Which of these have four wheels?” or “Which of these fly through the air?” or “Which of these travel on water?” Students can simply respond with a single word, “Wagon,” “Truck,” “Helicopter,” “Airplane,” but you can also draw them into more involved discussions. For example, “What happens when a motorcycle hits a big bump? Doesn’t it fly also?” or “How is a yacht different from other boats?” This is a simple activity, but it can be quite advanced also, especially if you adapt the topic and level to the students’ interests and needs. For example, if you are teaching English to medical students, you might use word cards with terms related to different types of medical apparatus. If they’re business students, you could use business terms. This is a fun activity that is very flexible and very adaptable.
- “Word Card Misfits” (also from David Cross, Practical Handbook of Language Teaching, p.124) (reading and speaking, get students out of their shells)
- Show 6 cards one at a time in silence. Which one did NOT belong? Why not? This activity is similar to “Read and Remember” above. It involves reading and speaking, and it helps get students “out of their shells.” It also requires some memory and concentration, as well as some analytical thinking skills. The preparation is simple (writing individual words on individual sheets of paper), but the choice of words is a little tricky. First of all, they must all be words that students are familiar with. If you choose words that the students do not know, the activity will not work. Also, and most important, if you show six words, five of them must be clearly related, and one has to be different. In class, you show each card silently, and students read the cards silently. Then, at the end you say, “One of these does not fit with the others. Which one?” For example, you might hold up cards with the following words: supermarket, hotel, restaurant, television, house, post office, and school. Which one does not fit? Students may say, “Television,” and you then ask, “Why not?” Then they have to explain, “It’s not a building.” You then ask “Are the others all buildings? How is a supermarket different from a post office? How is a supermarket similar to a school?” Suddenly your students are talking, and sometimes the discussion can get interesting, especially if you start talking about what the words mean. Also, students may come to different conclusions and debates can occur. For example, some hotels have restaurants and even post offices in them. Maybe they belong together, and some other word is the “misfit.”
- “Wh-Question Word Cards” (also from David Cross, Practical Handbook of Language Teaching, p.124)
- This activity requires a short little anecdote, and it helps if it is somewhat humorous (a good source is “Life in these United States” in the Readers Digest.) This can be a reading activity, if you have your students read the anecdote, but it can also be used for listening/speaking practice. Very simply, after your students read or listen to the story, you then cue them to ask and answer questions about it. The cueing is done by holding up cards with “wh-“ words on them: Who? What? When? How? How much/many? and Why? For instance, after students have read or listened to the story, you hold up a word card at random and ask a student to ask a question about the story starting with that wh-question word. Then, you (or the student who asked the question) can call on any other student in this room to answer the question. After they answer it, you check with the entire class to see if the answer is correct. Then you draw another wh-word card, and have the student ask another question starting with that word to any other student. This activity is more challenging (for the teacher to prepare and for the students to do) than the previous two, but it can provide good (and entertaining) practice at higher proficiency levels.
- “Creative picture stories”
- This activity requires mounted picture cards (large or small, depending on the size of the class and how hard it will be for everyone to see the pictures). At the most basic level, you simply give each student a picture (from a magazine or catalog) and some time. The student prepares a simple description of the picture and then shares that description with the entire class (or a smaller group of classmates). To make the activity more challenging and interesting, give each student two, three, or more pictures. The task then becomes to not just describe each picture but to create a story using all of them. Students can put the pictures in any order and use their creativity. Sometimes their stories will be very entertaining, and the rest of the class/group will be quite interested in listening to them. If you want to turn this into a writing activity, have students write their stories down on paper.
Teacher Art
 Pictures clipped from magazines and catalogs are useful. Having a CD or computer hard drive with lots of commercial, professional clip art on it is also nice, and you may be able to go online, download images from the Internet, and print them out for your instructional purposes. But you don’t have to rely on these external sources for every visual illustration. Pictures clipped from magazines and catalogs are useful. Having a CD or computer hard drive with lots of commercial, professional clip art on it is also nice, and you may be able to go online, download images from the Internet, and print them out for your instructional purposes. But you don’t have to rely on these external sources for every visual illustration.
With a little bit of practice and some confidence, you (yes, YOU) can draw your own pictures and use them for teaching materials. The most important thing to remember is that the purpose of these pictures is communication, not aesthetic effect. You don’t have to be a great artist. Even non-artistic teachers can draw simple pictures to support their teaching. It does not have to be beautiful; just communicate. Now, if you draw a cow, and it ends up looking like a truck, that’s a problem. But as long as it resembles a cow and communicates the idea of that four-legged, horned, dairy animal, that’s fine.
This kind of “teacher art” can make a big difference in your teaching, and its development requires only a little instruction and practice, not great artistic talent. Let’s start with something simple and useful--faces and emotions. All you have to do is combine a few different, easy-to-produce elements.
- Frames: These can be as simple as a circle, egg shaped oval, square, pear shape, or triangle. Or maybe you want to develop your own “trademark” frame.

- Eyebrows: These are very expressive, and very simple to draw.
- High, arched eyebrows signal intense emotion.
- Reversed eyebrows (like an upside-down V) show uncertainty, sorrow, worry.
- Low V-shaped eyebrows indicate something negative.

- Eyes: There are various, simple eyes that can be made with a couple of quick strokes. Experiment to see the different emotional effects that dots, slits, concentric circles, crosses, etc. produce.

- Mouths: These can be as simple as a flat, straight line, but there are lots of other possibilities: smile, open, frown, big circle, small circle, wavy line, a grid of teeth, a tongue in the back of a wide open mouth, etc.

- Tags: This final element is not necessary for showing emotions, but it does add personality and interesting variation. Tags can be ears, noses, different types of hair, glasses, hats, ties, stick-figure bodies, etc. Keep them simple. The best way to learn how to draw these different elements and then combine them for the desired effect is to doodle. Get out a blank piece of scratch paper and try drawing faces for various emotions (happy, sad, angry, surprised, shouting, tired (yawning), in pain, afraid, worried, puzzled, crying, concerned, hungry, flirting). It’s fun, and pretty soon you’ll have the confidence and skill necessary to do them on sheets of paper to use in activities or even on the board in front of your class.
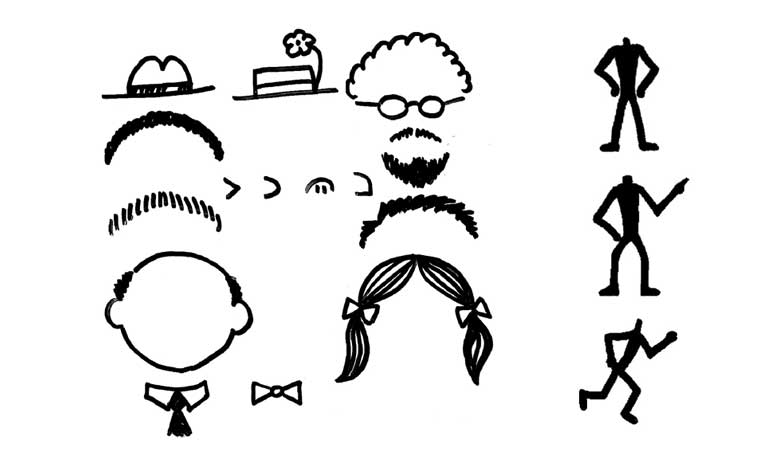
The best way to learn how to draw these different elements and then combine them for the desired effect is to doodle. Get out a blank piece of scratch paper and try drawing faces for various emotions (happy, sad, angry, surprised, shouting, tired (yawning), in pain, afraid, worried, puzzled, crying, concerned, hungry, flirting). It’s fun, and pretty soon you’ll have the confidence and skill necessary to do them on sheets of paper to use in activities or even on the board in front of your class.
Comprehension and reflection questions
- Looking back at the explanations above if necessary, answer each of the following questions:
- In your own language-learning experience, how helpful or memorable have the visuals or realia that your teacher(s) used been?
- Which of the 25 items listed in the “Collecting existing materials” section do you think will be most useful in your target teaching situation?
- What other language-teaching activities using picture cards can you think of?
- Try drawing the following items in a way that communicates the concept even if it is not necessarily artistic beautiful: airplane, dog, cat, house, mother, book, car.
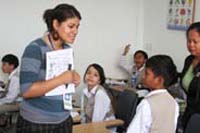
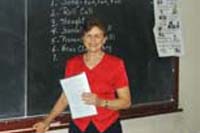
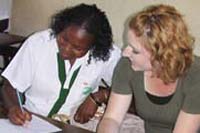
Video Examples
Here are some videos that we might watch in class:
- Old Ling 577 teaching materials files
- J. Beers: Mother’s Day lesson (CTW Video #10 @18:30).
- L. Henrichsen: Using “creative picture stories”in L. Hansen’s class (CTW Video #27 @25:50)
- A. Clark: Drawing an ant on chalkboard (CTW Video #12 @ 17:45)
- L. Henrichsen: Teacher art to go along with “Sippin’ Cider” song (CTW Video #21 @ 11:15)
Reflection and Responses
Think about each of the following questions related to the video you just watched. Write a sentence or two in response to each one.
- What materials did this teacher use to enhance the teaching and learning in her class?
- Where did he/she get these materials?
- Compare the teacher’s actions to what you read in the “The Least You Should Know” section above.
- Compare this teacher’s action to your own teaching experience.
Where to go to learn more
If you want to know more about collecting and creating your own teaching materials, you can refer to these additional resources.
Connections to other units in this program
- Unit #25 “Developing English language learners' reading skills”
- Unit #32 “Conducting effective and enjoyable conversation classes”
- Unit #33 “Using songs and chants to increase participation, recall, and enjoyment”
- Unit #35, “Teaching content-based language classes”
Online and other electronic resources
Print and paper-based resources
 David Cross. (1999). A practical handbook of language teaching. New York: Prentice Hall International. ISBN 0-13-380957-9 (out of print, but available from many used-book sellers) Starting on page 119, chapter 10 is devoted to making and using simple teaching aids. If you don’t know how to do this, here is all the guidance you need. Cross also provides a rationale for using teaching aids to enliven learning, create enthusiasm, improve memory. Cross worked as an English Teacher in some of the poorer parts of the world for about thirty years, so he knows how to work on a tight budget. Starting on page 110, there is also a whole section on how to draw pictures. It has lots of examples of teacher art that you can use as models. David Cross. (1999). A practical handbook of language teaching. New York: Prentice Hall International. ISBN 0-13-380957-9 (out of print, but available from many used-book sellers) Starting on page 119, chapter 10 is devoted to making and using simple teaching aids. If you don’t know how to do this, here is all the guidance you need. Cross also provides a rationale for using teaching aids to enliven learning, create enthusiasm, improve memory. Cross worked as an English Teacher in some of the poorer parts of the world for about thirty years, so he knows how to work on a tight budget. Starting on page 110, there is also a whole section on how to draw pictures. It has lots of examples of teacher art that you can use as models.
Bruce Marsland. (1998). Lessons from nothing: Activities for language teaching with limited time and resources. Cambridge: Cambridge University Press. ISBN 0-521-62765-6 “Lessons from Nothing is a practical sourcebook of around 70 language teaching activities which do not require extensive facilities or preparation. Devised primarily for teachers working in limited-resource environments, this book is invaluable for busy teachers everywhere who are looking for easy-to-use activities.”
Andrew Wright. (1984). 1000 pictures for teachers to copy. Collins ELT and Addison-Wesley Publishing Co. ISBN 0-201-09132-1 “Many teachers recognize the usefulness of simple drawings in their teaching. For language teachers…drawings have many advantages: they are quick to do; their content can be determined exactly by you; and they are easy to reproduce. But many teachers think they cannot draw, or that they do not have the time to do so. For these teachers, 1000 Pictures for Teachers to Copy is a unique and invaluable resource. The numerous themes and subjects covered by the illustrations in this book…include people, animals, everyday settings, common lexical items, grammatical points and sequential narrative.”
Norma Shapiro and Carol Genser. Chalk talks. Berkeley, California: Command Performance Language Institute, 1994. ISBN 0-929724-15-1 “This unique book will allow you to accomplish things in the language acquisition classroom that you may not have thought possible. You will be able to use your students’ own lives, regardless of their age or learning level, as a basis for your lessons—their stories, their ideas, their real-life concerns. How is this possible? The secret is in the symbols—simple drawings that serve as immediate cues for speaking.”
If you have suggestions for other resources (books, websites, etc.), please send them to TLYSK@byu.edu
|